|
|
Basic coding in picture sources
This topic will get you started with coding picture sources—refer to More manual coding techniques for more detailed information.
What do you want to do?
- Understand what you can code in a picture source
- Code at a node
- See what you have coded
- Open a node to see the references
Understand what you can code in a picture source
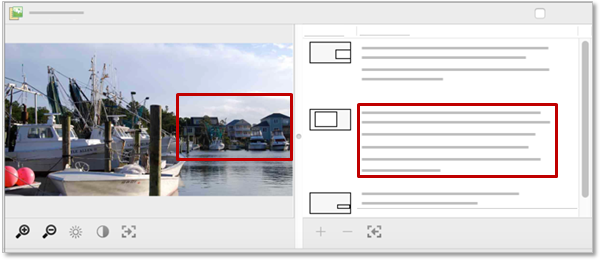
In picture sources you can code:
-
A region of the picture
-
Text in the Content column of the picture log (if you have one)
-
The entire picture source

Code at a node
-
Select the content you want to code.
-
On the Analyze tab, in the Coding group, under Code Selection At, click one of the following:
-
New Node—to code the content at a new node. Click the Select button if you want to change the location for the new node. Enter a name and a description (optional), and then click Done.
-
Existing Nodes—to code the content at previously created nodes. Select the nodes and then click Done. You can also drag and drop content on existing nodes in List View.

NOTE
-
You can use the Code button at the top of Detail View or use the control-click shortcut menu to code. You can also drag and drop content onto existing nodes. Refer to Coding techniques for more detailed information about coding.
See what you have coded
To see what has been coded in a source, you can:
-
Turn on coding highlight—on the View tab in the Coding group, click Highlight, and then select a highlight option. Coded content is highlighted in yellow.
-
Turn on coding stripes—on the View tab in the Coding group, click Coding Stripes, and then select an option. Coding stripes are displayed on the right of the source.
For more information, refer to Highlight coding references and Use coding stripes to explore coding.
Open a node to see the references
You can open a node to see all the coded references.
-
In Navigation View, locate and click the folder that contains the node you want inspect.
-
In List View, double-click the node. The node opens in Detail View.

NOTE
-
When coding to a new node, you can create the new node in a specific nodes folder or underneath another node in a hierarchy—click the Location disclosure triangle and choose a new location.
-
If you want to code to a new case, then on the Analyze tab, in the Coding group, under Code Selection At—hold down New Node and then click New Case.
-
To indicate that coding is successful, a confirmation message is briefly displayed in the NVivo status bar.
-
Refer to More manual coding techniques for more detailed information about coding.


