


|
|

Use coding stripes to explore coding
Coding stripes are colored bars displayed alongside source or node content that allow you to see how the content is coded.
What do you want to do?
- Watch a video tutorial
- Understand coding stripes
- Using coding stripes in different types of sources
- Check coding density
- Show coding stripes for all nodes that code the content
- Show coding stripes to see nodes most, least or recently coding the content
- Show coding stripes for selected nodes
- Change the color scheme for your coding stripes
- Change the number of stripes displayed
- Print coding stripes
- Hide coding stripes
Watch a video tutorial

Understand coding stripes
Coding stripes are colored bars that show you the nodes that code the content you are viewing:
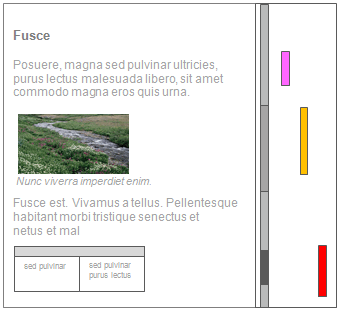
The Coding Density bar is to the left of the colored coding stripes—you can choose to show only the coding density bar.
You can hover over a coding stripe to see more information or right-click on a stripe to:
-
Highlight coding for the node that the stripe represents (content is highlighted in yellow)
-
Open the node in Detail View
-
Uncode all content coded at the node (only content in the source or node you are working with is uncoded)
You cannot display coding stripes when a source is in edit mode.
Using coding stripes in different types of sources
The way that coding stripes work varies slightly in the different source types.
For most source types, coding stripes are displayed in a pane to the right of the source content. For audio and video sources, coding stripes are displayed below the timeline and to the right of the transcript.
Sometimes, you will need to use coding stripes together with highlighting to see exactly which content is coded at the node represented by the coding stripe. To highlight the coded content, right-click the coding stripe and then click Highlight Coding.
For example, you may want to highlight coded content, to see what text in a dataset row is coded—is the entire row may be coded, or is the coding only in one of the cells of the row?
Check coding density
When you display coding stripes, the Coding Density bar is visible on the left of the display.
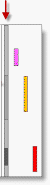
You can hover over the Coding Density bar to see the nodes that code the related content. The color graduations indicate the coding density—light gray (minimal coding) to dark gray (maximum coding). The coding density is calculated based on all nodes that code the content—not just those that are currently displayed in the coding stripes.
To save space, you can choose to show only the coding density bar—on the View tab, in the Coding group, click Coding Stripes and then click Coding Density Only.
Show coding stripes for all nodes that code the content
You can show coding stripes for all the nodes that code the content. This might include stripes representing themes, people or places.
To show coding stripes for all nodes:
-
Open the source or node.
-
On the View tab, in the Coding group, click Coding Stripes, and then click All Nodes Coding.
NOTE
-
To change the nodes displayed as coding stripes (for example, to remove stripes), click Selected Items under Coding Stripes to open the Select Project Items dialog.
-
If more than 200 nodes code the item, then the nodes that 'least' code the content are excluded.
-
You can resize or scroll the coding stripes pane to see the nodes that are displayed.
-
Press ⌘+P to print the node with coding stripes.
Show coding stripes to see nodes most, least or recently coding the content
Showing the nodes that most or least code the content can help you to see the dominant themes in your source materials.
When you are coding your source materials, showing coding stripes for the nodes recently coding the content, allows you to see the coding you have just done—this is one way to check that you coded the content to the correct node.
To show the nodes most, least or recently coding the content:
-
Open the source or node.
-
On the View tab, in the Coding group, click Coding Stripes, and then click Nodes Most Coding, Nodes Least Coding or Nodes Recently Coding.
Show coding stripes for selected nodes
You can show coding stripes for selected nodes—these could be theme nodes or case nodes.
To show coding stripes for selected nodes:
-
Open the source or node.
-
On the View tab, in the Coding group, click Coding Stripes, and then click Selected Items.
-
Select the nodes that you want to show coding stripes for—nodes in bold currently code the content.
-
Click Select.
NOTE
-
To change the nodes displayed as coding stripes, click Selected Items under Coding Stripes then select (or deselect) nodes depending on the coding stripes you want to display.
Change the color scheme for your coding stripes
If you have assigned colors to your nodes, then you can show these colors when you display coding stripes for nodes.
When you display coding stripes, you can use default colors (random system-generated colors) or item colors (user assigned colors):
To change the color scheme for coding stripes for the item currently displayed in Detail View
-
On the View tab, in the Coding group, click Coding Stripes, and then select Use Item Colors or Use Default Colors.
Change the number of stripes displayed
When you choose to show stripes for the nodes most, least or recently coding the content, by default seven stripes are displayed.
To change the number of coding stripes currently displayed for the source or node you are viewing:
-
Open the required source.
-
On the View tab, in the Coding group, click Coding Stripes, then click Number of Stripes.
-
Enter the number of stripes to display (between 7 and 200).
-
Click OK.
Print coding stripes
You can print a source or node along with its coding stripes, when the source is open in Detail View with coding stripes displayed.
When you print documents, memos, externals or print the Reference view of a node,coding stripes are printed on the same page as the source or node content—the source or node content is scaled and rotated to allow space on the page for the coding stripes.
This means there is a limit to the number of coding stripes that you can print—if you have a large number of stripes displayed, NVivo may not be able to fit them all on the page.
Hide coding stripes
If you do not want to show coding stripes:
-
On the View tab, in the Coding group, click Coding Stripes, and then click None.